Connect Remix to POTOS#
Remix is a browser-based IDE (Integrated Development Environment) for developing Solidity contracts. In this guide, you will learn how to:
Create and upload a pre-built smart contract in Remix IDE.
Compile the smart contract.
Set up the deployment environment.
Import an account.
Connect POTOS to Remix using MetaMask
Deploy the smart contract.
Verify the smart contract.
This section will cover how to connect Remix with POTOS. If you want to know more about Remix, please refer to Remix docs or Remix IDE.
Create a file on Remix#
To start building a smart contract, click on New File icon in the contracts folder in the File explorer tab and name it MyToken.sol
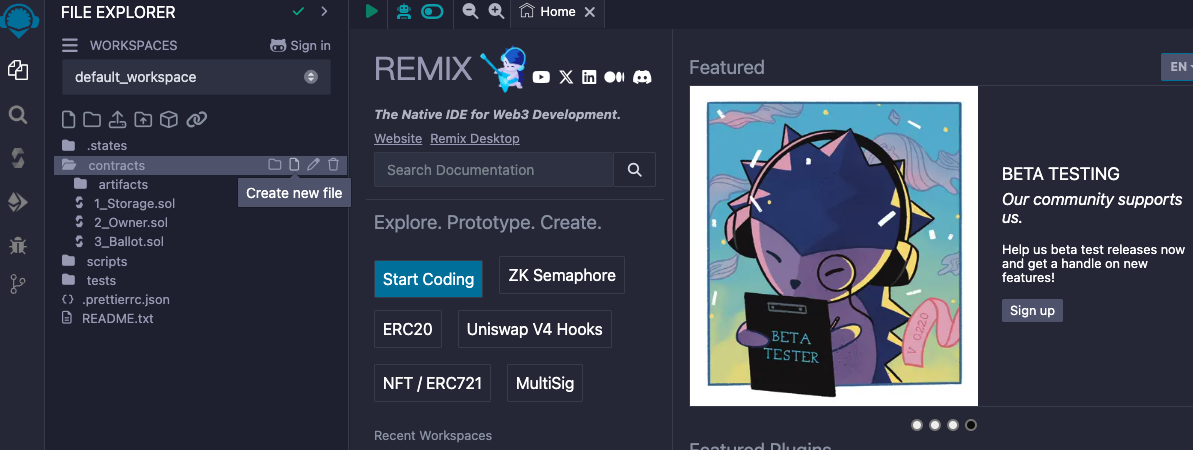
Then copy and paste the smart contract code provided below into the newly created MyToken.sol file.
// SPDX-License-Identifier: Apache 2.0
pragma solidity ^0.8.20;

import "@openzeppelin/contracts/token/ERC20/ERC20.sol";
import "@openzeppelin/contracts/token/ERC20/extensions/ERC20Permit.sol";

contract MyToken is ERC20, ERC20Permit {
    constructor() ERC20("MyToken", "MTK") ERC20Permit("MyToken") {}

    function mint(uint256 value) public {
        _mint(msg.sender, value);
    }
}
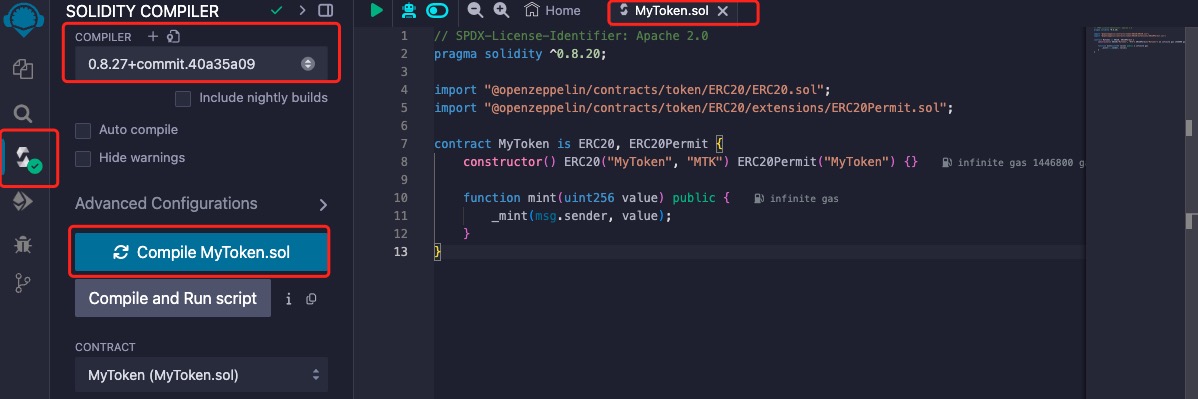
Compile the smart contract#
To compile your contract, do the following:
Go to the Solidity Compiler tab.
Select compiler version to 0.8.27.
Turn on the ``Auto compile’’ option.
Click on the Compile MyToken.sol button to compile
MyToken.solcontract.If compile successfully, it will show a green tick mark on the Compiler tab button.
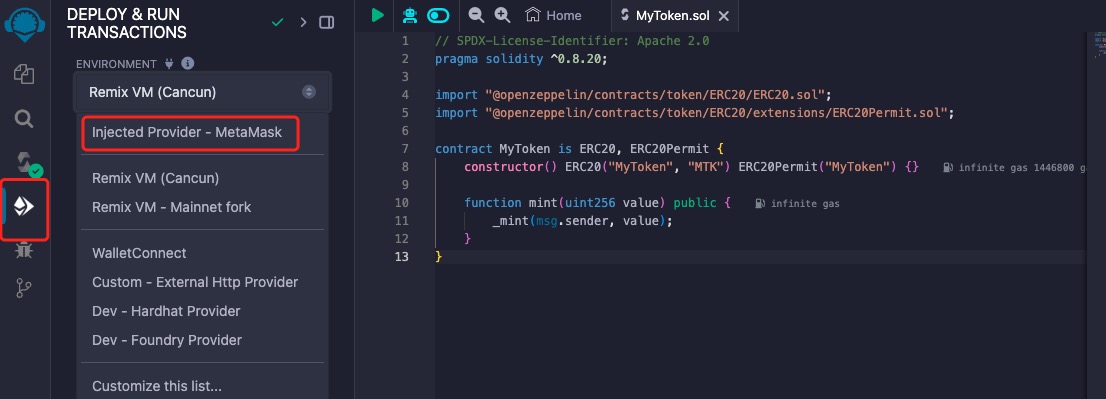
Set up the deployment environment#
Open the Depoly and run transactions tab and select Environment to Injected Provider - MetaMask
Import an account in Metamask#
You first need to use Metamask to create a new account or import exist account. More about account in Metamask
When you see the MetaMask pop-up, select your account.
Once you are successfully connected to the Network, you will see the the corresponding Chain ID and Account of the connected network.
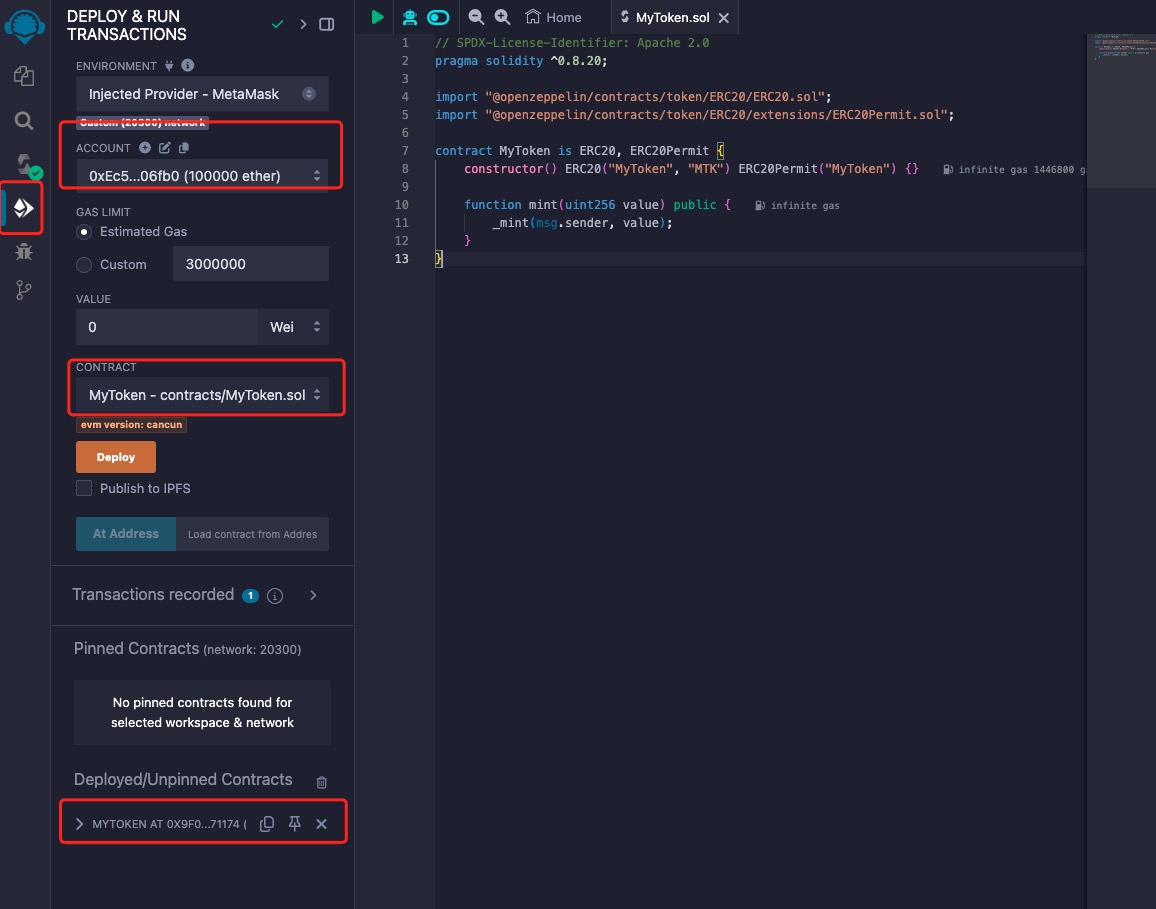
Deploy the smart contract#
On the premise that MyToken.sol has been compiled, follow the deployment process below:
Go to the Deploy & run transactions tab.
Make sure ENVIRONMENT is
Injected Provider - Metamask.Select the contract you want to deploy in the CONTRACT field.
Click on the Deploy button. This would generate a Metamask popup that requires transaction confirmation. Simply confirm the transaction!
Interact with the smart contract#
After deploying, you can interact with the contract by calling the mint function by following the below stpes. This function will mint tokens to the account of transaction sender.
Go to the Deploy & run transactions tab
Select the deployed contract.
Click on the mint function.
Enter the amount of tokens you want to mint.
Click on the transact button.
Confirm the transaction in Metamask.
You can click on the “Terminal” tab below the page to see the transaction details.
![]()